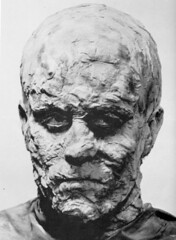
Dick Smith's Ghoul #2 is slightly more elaborate that his Ghoul #1. The former was designed to be made entirely with greasepaint, while this ghoul requires building the features out with cotton. Cotton might seem like an unusual ingredient, but master horror makeup artist Jack Pierce used it extensively. Building up the features of his actors with cotton and Collodion, he was able to create such classic designs as Frankenstein's Monster and the Wolf Man.
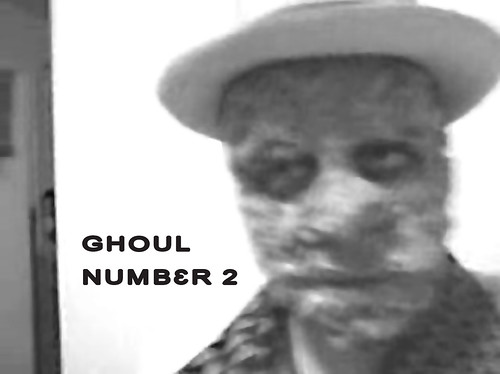
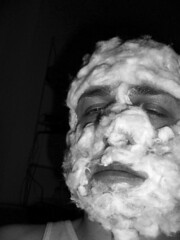
Dick Smith does basically the same thing, except, instead of gluing the cotton to the face with Collodion, he uses one of the makeup artists' other best friends: Karo Syrup. He covers the cotton with liquid makeup, and the results are quite startling:
Creepy! Let's get started!
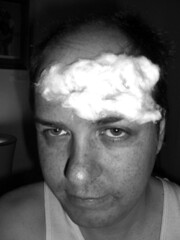
STEP ONE: Apply the cotton balls Tug on the cotton balls until they're no longer balls-shaped, and then affix them to your future ghoul's face. Dick Smith recommends using Karo Syrup, we used Spirit Gum, you can also use surgical adhesive, which has become quite popular among makeup artists, and was another of Dick Smith's innovations.
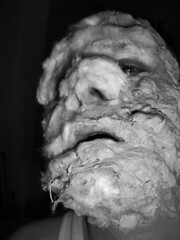
The thicker the cotton balls, the thicker the resulting face will be. Courtney decided to make the cotton on Max's face thicker than in Dick Smith's example, especially around the nose, which, as you will see, gave the resulting ghoul a bloated, almost melting quality.
Be very careful in gluing cotton balls over hair. Max got some on her hairline, and it was somewhat painful to remove. Nail polish remover or baby oil will help, but it's a little like getting gum out of hair.
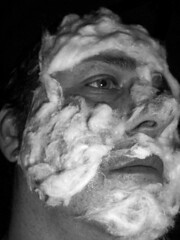
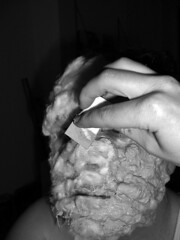
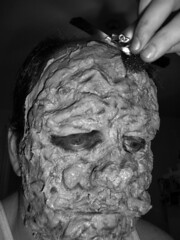
STEP TWO: Add makeup over cotton Dick Smith suggests using sallow purple liquid makeup, to which he recommends adding some school glue to make it harden thicker (by this we presume he meant Elmer's glue). We happened to have liquid latex on hand, so we used that in the same way. Courtney colored the latex a horrid purple grey and then simply painted it over the cotton.
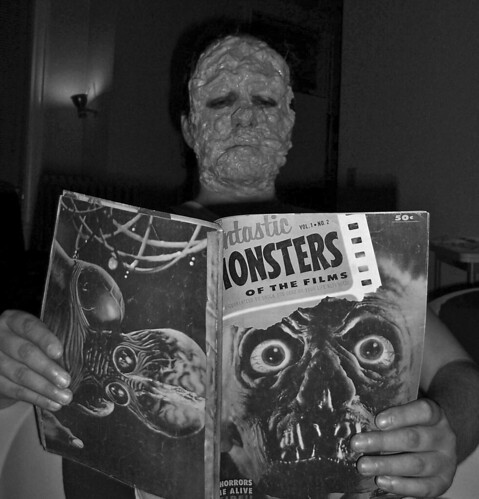
STEP THREE: Let the makeup dry Especially if you are using liquid latex, it's going to take a few minutes to dry. Sit back and read a magazine.
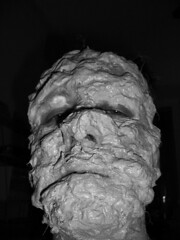
STEP FOUR: Add details with makeup Courtney first went in and used black greasepaint to accentuate the makeup's natural shadows, particularly around the eyes and under the chin.
You don't want your makeup to all be one color -- in Max's case, it made him look a little like a melted candle. So Courtney used a stipple sponge to add some ghoulish colors -- greens and yellows in particular. We experimented with making the mouth a ghastly yellow.
And here's the completed Ghoul #2!
SEE GHOUL #2 IN ACTION DANCING THE NEWEST TEEN DANCE CRAZE, THE BIRD FLU!
Ghoul #1 is the second project in Dick Smith's book, and he designed it to be done entirely with greasepaint -- the ghoul face is supposed to be just painted on. We modified it a little, as we already had experience with Collodion and we happened to have some stage blood on hand, but we really didn't need to. Even just using greasepaint, Smith's first ghoul is a pretty ghastly apparition:
STEP ONE: Collodion scarring The actual requirements in Dick Smith's book are yellow, black, green and red greasepaint. As the creature will have a ghastly scar running down the side of the face, we decided to begin with Collodion, although the scar could just as easily be made using the red greasepaint, as Smith does in his book. As we described earlier, rigid Collodion is easy to use. You just paint it on the skin and it will take on the appearance of a scar. You can add more Collodion if you want to make the scar appear deeper.
STEP TWO: Color the face yellow We next make the ghoul unworldly colored, giving the face a good solid coating of yellow greasepaint and powdering every so often. Courtney left the area around the eyes mostly free of makeup, as they will be surrounded by black ovals later in the process.
STEP THREE: Add deep circles around the eyes This you do with the black greasepaint, but don't go right up to the eyes. Instead, color around the eyes with red greasepaint, which will give them a sickly color. Be careful not to get red greasepaint in the eyes, as it can cause infection. Additionally, use the black greasepaint to make the eyebrows look shaggier than they really are.
STEP FOUR: Blacken the nostrils This will make the ghoul truly cadaverous. Just use black greasepaint to darker the area around the nostrils, so they look wider and larger than they really are.
STEP FIVE: Created horrid wrinkles Use the black makeup to make deep, gouged laugh lines. The black paint should also be used like lipstick, but make the lips thinner than they are. Now add radiating lines around the mouth, which will give it an ancient, puckered look. Once you've done this, use the black greasepaint to hollow out the cheeks. If you want to make the ghoul extra corpse-like, go over the black shadows on the face with a little bit of green greasepaint.
STEP SIX: Outline the scar in white The effect is stagey but nonetheless makes the scar quite vivid. If you are not using Collodion, simply draw the scar on in red greasepaint. If, like us, you happen to have some stage blood on hand, you can add blood to the scar for an extra-horrid effect.
Now you're done! Throw on some old clothes and a battered hat to complete the effect, or just mess your hair up. A ghoul is, after all, a graveyard spirit, and sometimes is thought to eat human flesh, so feel free to look appropriately scruffy. Or, if the mood strikes you, dress up like you're going to a funeral.